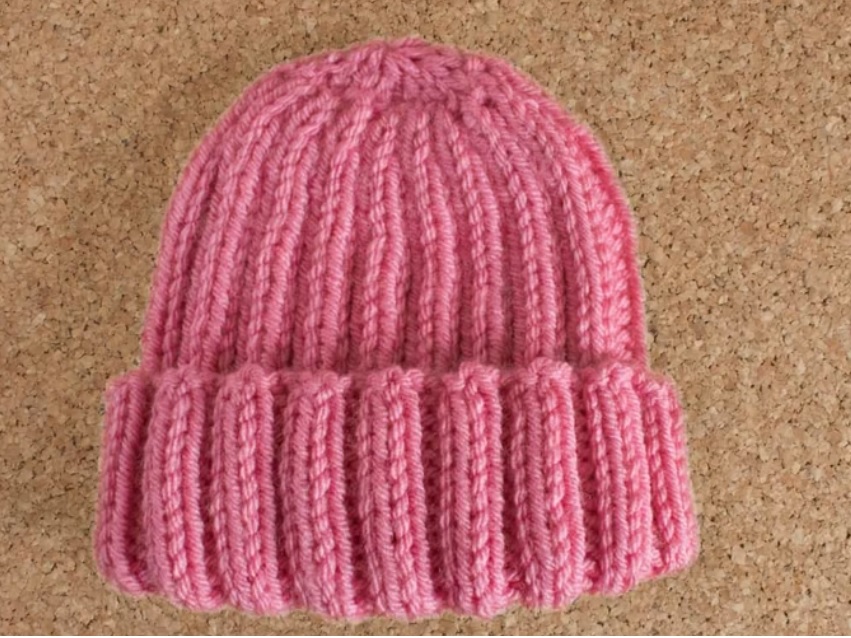
The Easy Beanie

measurements
tension20 stitches and 19 rows to a 10cm square in 1×1 rib stitch using 6.5mm needles.Check your tension – if fewer stitches use thinner needles, if more stitches use thicker needles.
One Size – The finished circumference is 36cm unstretched, which can stretch out up toaround 70cm.The finished length is around 25cm before turning up the brim, however this can be shortened
or lengthened as required!
materials
Paintbox Yarns
Simply Chunky
100g balls
Metres of yarn
required
needles
1 pair of 6.5mm straight needles
1 tapestry needle (for sewing in ends)
Note: This pattern is designed so that you can substitute the yarn for a different brand, if youso wish!
One Size
1100m
abbreviations
beg beginning
cm centimetre(s)
k knit
k2tog knit 2 together
p purl
p2tog purl 2 together
RS right side
st(s) stitch (es)
tog together
WS wrong side
working abbreviations
2×2 rib
1st row: *k2, p2, rep from * to end.
2nd row: *k2, p2, rep from * to end.
Hat
step 1: with 6.5mm straight needles, cast on 72 stitches
step 2: work in 2×2 rib until work measures 21cm (feel free to lengthen this if you would prefer
the hat to not have a cropped finish).
step 3 (RS): *k2, p2tog,* repeat between the *s until the end of the row.
step 4 (WS): *k1, p2,* repeat between the *s until the end of the row.
step 5 (RS): *k2, p1, repeat between the *s until the end of the row.
step 6 (WS): *k1, p2,* repeat between the *s until the end of the row.
step 7 (RS): *k2tog, p1,* repeat between the *s until the end of the row.
step 8 (WS): *k1,p1,* repeat between the *s until the end of the row.
step 9 (RS): *k1,p1,* repeat between the *s until the end of the row.
step 10 (WS): *p2tog,* repeat between the *s until the end of the row.
step 11 (RS): *k2tog*, repeat between the *s until the end of the row.
TO MAKE UP
Cut yarn, making sure to leave a tail long enough for sewing up the side seam. Weave the
yarn through the remaining stitches, and remove the stitches from the knitting needle, pulling
the yarn tight to create the crown of your hat. With RS facing you, sew the side seam. Around
7.5cm from the bottom, turn the hat inside out and sew the rest of the seam on the reverse
side (this will be the bit that you turn up for the brim!)
Finally, sew in your ends and cut your yarn – you’re all done!
PATTERN IS FOR INDIVIDUAL USE ONLY


